
The Complete Manual On Taking Screenshots On A MAC 2023
How to screenshot on a Mac is a common question among new Apple users, especially those who are switching from Windows and are accustomed to using the Prt Scrn (Print Screen) button. Despite the fact that taking a screenshot on a Mac merely requires hitting a few keys, it is nevertheless true that the process hasn’t always felt very natural. For instance, in addition to distinct key commands for taking screenshots of windows as opposed to smaller selections, it was once the only way to record video of your screen using QuickTime Player.
You can learn more about taking screenshots on a Mac (and recording video) in this guide. You can also find some helpful tools to make taking Apple screenshots simpler.
Mac screenshot shortcuts
Every Mac computer has the ability to take fine-quality screenshots, which you may then edit or distribute as necessary. The entire screen, a window, or only a portion of it can be captured. Every Mac screenshotting method uses the Shift, Command, and number keys.
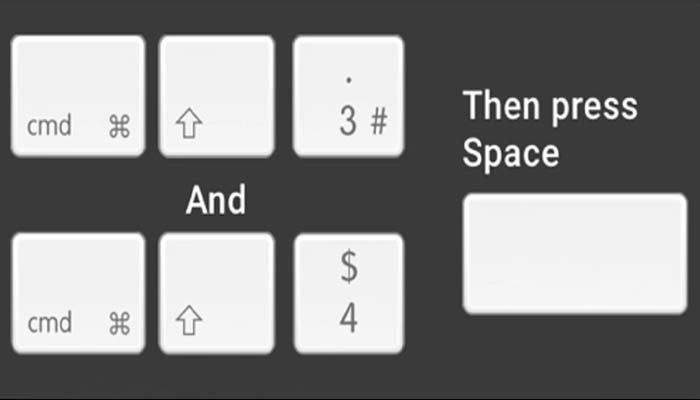
- To capture the entire Mac screen, hold down Shift, Command, and 3, then click the screenshot button.
- Use Shift + Command + 4 if you only need to capture a portion of your screen. A cursor will become a crosshair as a result. Click, drag, and then let go of the mouse button to screenshot an area.
- Press and hold Shift + Command + 4 and Space, and then select the Mac window(s) you want to take a screenshot of. Your cursor’s crosshair should change to a camera icon. After highlighting various windows with your cursor, click to take a screenshot.
However, Apple’s native screenshot tool only provides you with five ways to record the screen of a Mac. You’ll learn that there are many more available with third-party apps as you continue reading. So let’s find out what suits you the best.
Best screenshot app for your Mac
You are aware that the native tool can’t take scrolling screenshots, so you are looking for a Mac snipping tool that can do a little bit more. Thus, you must consult a third-party developer. Here, CleanShot X is unrivalled. The programme is the best screen-capturing tool for Mac because it can adapt to more than 50 distinct modifications.
CleanShot X lets you take screenshots of the entire screen, a window, a portion of the screen, or even scrolling information. It also lets you record videos and GIFs. You have the option to turn off desktop alerts and hide all desktop clutter while taking a screenshot of something on your desktop. When you have a clear screenshot, start modifying it by opening it in the overlay window that appears. You may tweak practically anything with CleanShot X, whether you want to add comments, blur particular areas, or sketch.
Self-timer, screenshot pinning, and internal cloud are a few less visible yet cool things to highlight. Do you want to delay the capturing of something? The self-timer in CleanShot X will assist you in choosing the ideal moment. Pin your screenshot on the desktop if you want it to be visible on the screen. Save your screen captures to the internal CleanShot Cloud, and you’ll instantly have shareable links.

Using the Mac’s screenshot menu, take a screenshot
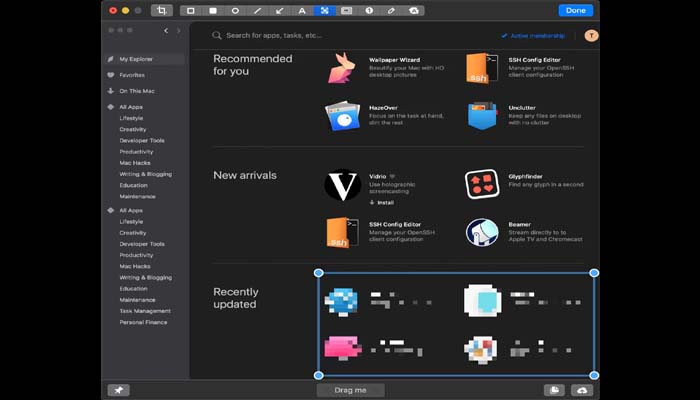
On macOS Mojave and later, you can either utilise specialised keyboard keys for each activity, such as capturing a window or a selected region, or enter the screenshot menu and select your method of screen capture. The commands to capture a portion of the screen or the entire screen are present in MacOS versions published before Mojave, but the screen capturing menu is absent.
Users of the Mojave, Catalina, Big Sur, or Monterey operating systems can access a screen capture menu by pressing Command + Shift + 5 to bring it up. This menu includes options for:
- Capture Entire Screen
- Capture Selected Window(s)
- Capture Selected Portion
- Record Entire Screen
- Record Selected Portion

The Settings button is located on the right side of this menu and allows you to choose where your MacBook screenshots and video output are saved, among other things. To put it another way, anyone hoping for a quick solution to the issue “how can I snap a screenshot on my Mac?” would be far better off upgrading to Mojave.
Print Screen Of A Selected Area
Recall how we discussed shortcuts? Let’s return to the specifics. How to snap a screenshot of a particular location is as follows:
- To press and hold all three keys at once, use Shift, Command, and 4.
- Drag the crosshair to choose the area of the screen to capture. To move the selection, press and hold the Space bar while dragging. The screenshot can be stopped by pressing the Esc (Escape) key.
- To take a screenshot, release the mouse or trackpad button.
- If a thumbnail of the screenshot shows in the corner of your screen, click it to change it. Wait until the screenshot is saved to your desktop as an alternative.
Capture A Screenshot Of The Entire Screen
To take a screenshot on your Mac, adhere to following instructions:
- Keep pressing. Command, 3 and Shift all at once
- If a thumbnail of a screenshot appears in the corner of your screen, click it to edit it. Another option is to hold off until the screenshot is saved to your desktop.
How To Screenshot A Specific Section Or Window On Mac
Let’s take a window or menu now:
- Open the window you want to capture.
- Next, hold down the Shift, Command, 4 and Space bars. A camera icon will appear in place of the pointer. Press the Esc (Escape) key to stop taking the screenshot.
How To Use The Touch Bar To Take Screenshots
Does your Mac have the Touch Bar if you’re still convinced you need the Windows-style print screen button? If so, you can designate a button just for screenshots! This is how it goes:
- Choose System Preferences > Keyboard from the Apple menu.
- choose Control Strip Customization.
- Drag and drop your screenshot button to the desired location on the Touch Bar, then save your changes.
You can now screen capture a Mac using only your Touch Bar. A menu for taking screenshots will appear when you click the screenshot button. If you want to change the location where your screenshots are saved, click “Save To”. Select whether you want to capture the whole screen, a specific region, or a window. Simply move your cursor after that to take a screenshot.
Third-party macOS screenshot apps
If you’re looking for something with a little more emphasis on screen recording than CleanShot X, which we already mentioned, we also suggest Capto. On a Mac, in addition to recording video or simply taking pictures, you can also annotate and edit screenshots using a user-friendly interface akin to iMovie.
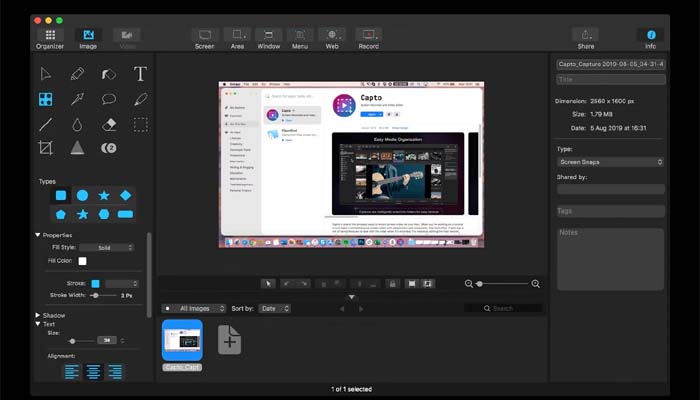
If you want to record a video tutorial and publish it anyplace, Capto works great. Also, because of its significant visual component, it’s ideal for folks who prefer captions to voiceovers due to aural timidity. The organiser that comes with Capto is really useful for managing your screenshots.
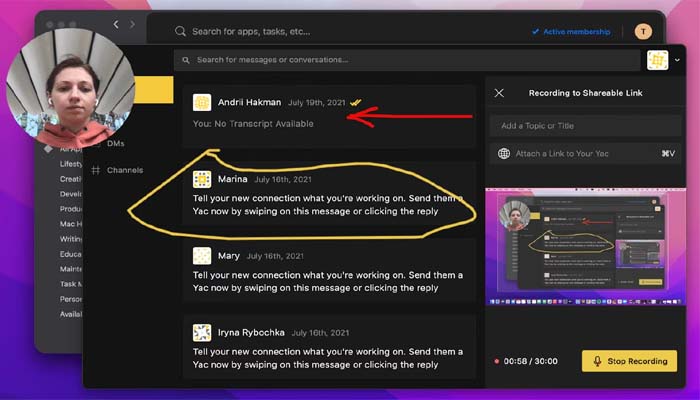
If you need a quick way to communicate with your coworkers without calling them, Yac is the software you should think about. We’ve had way too many virtual meetings lately, don’t you think? Use this asynchronous audio and video messaging application instead, which is preferred by millions of remote employees worldwide.
Simply record a brief voice message, add a screen capture with annotations and a webcam if you wish, and allow your coworkers to listen to it whenever it suits them. You may combine Yac with Slack to receive notifications whenever someone sends you a yac.
Lastly, a screenshot feature is available in many sophisticated media players. This is especially helpful if you want to preserve specific moments in a movie or video because, when you view a movie online, most streaming providers forbid the use of screenshot tools, making it impossible to do so. Alternatively, think about utilising Elmedia Player to play any media files and instantly take screenshots.
How to use Preview on a Mac to print the screen
Apple’s primary picture and PDF viewer, Preview, is certainly a crucial component of your workflow. You can take a screenshot of a window, a portion of the screen, or the entire screen using this programme. Taking screenshots in Preview has the advantage of opening the screenshot you just took in a new Preview window so you may edit it, resize it, add notes, etc.
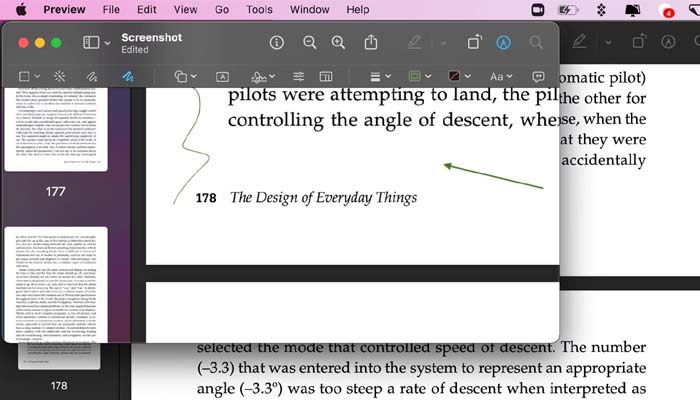
How do you use Preview on a Mac to snap a screenshot? It’s easy. Choose File > Take Screenshot from the app’s menu, then choose the area of the screen you wish to capture. You may then edit and save your screenshot to any location on your Computer at will.
MacOS screenshot organization
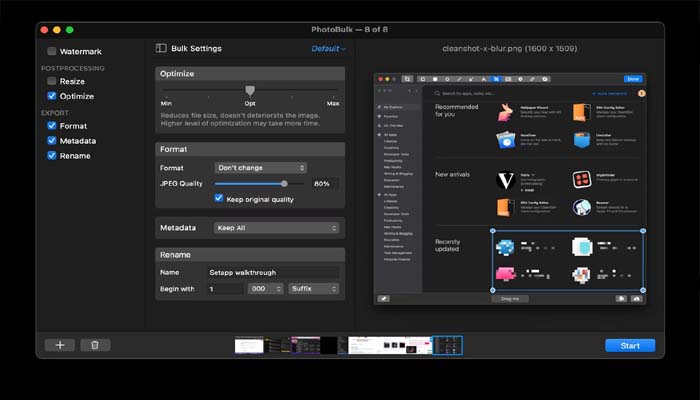
If you frequently take screenshots, you’re undoubtedly accustomed to finding photos labelled “Screen Shot 2019-XX-XX at 21.36.15” in your Downloads folder or on your desktop. Not that useful for keeping track of all of your photographs, especially given how frequently macOS shortens filenames.
Even if you can use Finder and Preview to view all of your caps, the visual experience is still unsatisfying. PhotoBulk, a bulk image editor made to rename, resize, and compress photographs in mass, is one of the best alternatives. Drag & drop the screenshots you wish to rename, write the group name, and click Start to get started. Your renamed photos will be properly organised into their respective folders.
How to share Apple screenshots
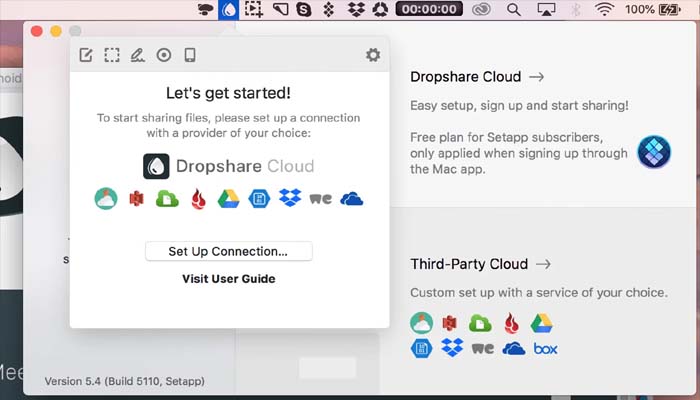
Yet even when you’ve figured out how to take a screenshot on a Mac, it may not always be simple to share those screenshots with people like coworkers or friends. You can think about using a system like Dropshare rather than sending things back and forth over email or having to publish everything to a public Google Drive. As the name implies, sharing screenshots (and other files) is as easy as dragging and dropping them into the appropriate location.
If you want, you may rely on Dropshare’s proprietary Dropshare Cloud, which is useful if you want to keep your Mac screen capture sharing distinct from your other sharing activity. Dropshare interacts with a variety of popular third-party cloud programmes, but you can also use
Conclusion
As you can see from the example above, taking a screenshot on a Mac isn’t particularly challenging. In fact, it’s now simpler than ever owing to the inclusion of a specific MacBook screenshot and video capture menu in macOS.
Apple has made improvements to the procedure in the past, so you can probably anticipate more in the future. It’s evident that Apple recognises the print screen Mac difficulty for Windows switchers. In the meanwhile, there are a number of top-notch solutions available in the snipping tool for Mac market that simplify the procedure and provide a variety of unique features absent from those built-in Mac snapshot options.
The best part is that you may test out all the apps listed here: With a 7-day trial of Setapp, a subscription with 240+ indispensable apps for any task at hand, you can get CleanShot X, Capto, Elmedia Player, Yac, PhotoBulk, and Dropshare for free. You are now prepared to begin your screenshotting game.
Humbly Request To All Visitors!
If you found above both downloading link expired or broken then please must inform admin by fill this Contact Us! Form